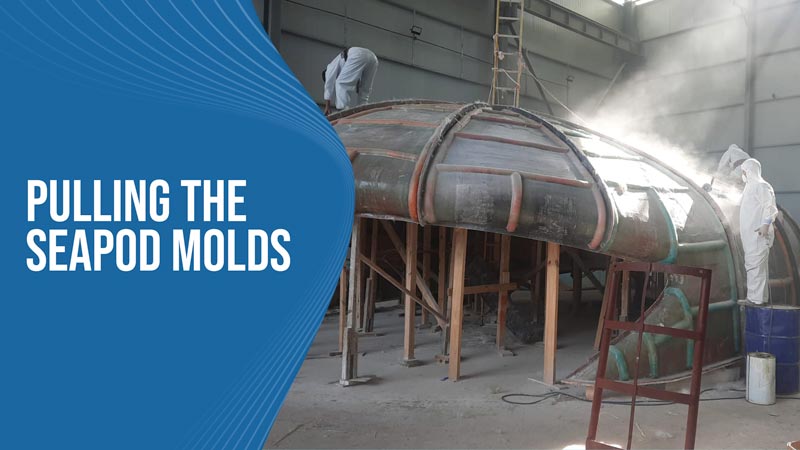
After about a month of work, the time has finally come to remove the SeaPod shell molds from the plug. This has been a long process but these molds will be what gives the SeaPod its shape so we had to get it right.
These sections are considerably bigger than the molds for the bottom of the SeaPod so they take quite a bit more work to remove them from the plug. The top shell of the SeaPod has 12 mold sections that we pull off individually.
We attach each section to our crane so that we can pull it upward to lift it off of the plug. Additionally, we use a hose to push water between the mold and the plug and use rubber mallets to knock everything loose. The upward lift, pressure from the water, and vibrations from the mallets eventually make the mold release.
We then use the crane to lower the sections down to the ground so that we can disconnect the mold from the chains and wipe everything down. We are moving the sections out of the way for now so that we can do the finishing work on each section.
Each section of the mold will need about 4-5 hours of additional work to get them ready for production. The surface of the tooling gel coat is still rough so we will use a finishing wax and fine-grit sandpaper to polish the surface to get the super-smooth finish that we are looking for.
This process will be repeated for each of the 12 sections and when all of the finishing work is completed, we will have the molds that we need to produce the top shell of the SeaPod. This is a huge step closer to getting a completed SeaPod into the water. We hope that you are as excited as we are!