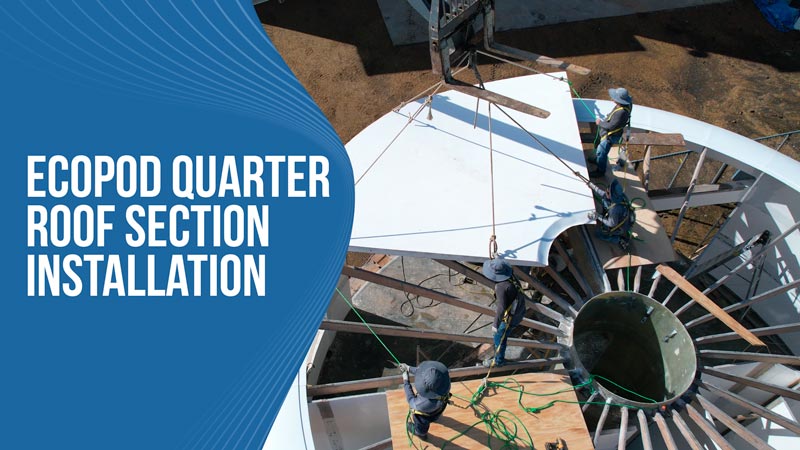
This video shows the process of how we install the four quarter sections of the EcoPod roof. We made these four sections with a mold and finally started to put them into place. These pieces are large and cumbersome to deal with but with a bit of muscle and help from our telehandler, we were able to get the job done without too much of a headache.
We used the telehandler to move them on top of the EcoPod where the crew positioned them where they needed to go. The rib structure will be just below the roof similar to how a truss would work in a traditional wood frame house. These ribs will provide the strength and support that the roof will need.
Every piece of the SeaPod and EcoPod was designed on computers so we had a pretty good idea of the sizes that we needed for everything. The problem is that when going from computer designs to real life, things can be just a little bit different and that small difference can be difficult to manage.
When manufacturing these pieces, we have a goal for the tolerance that we want to stay within. For example, if we have a 2mm tolerance for a part, we want the final piece to be within 2mm of expectations. Perfection is impossible so we use tolerances to get it as close as possible.
Since these panels have such a tight fit, it took a bit of work to get them properly aligned and in place. This video shows us putting the first three quarters in place. The first three are the easiest and the fourth is a bit of a challenge, keep your eyes open for Part 2 to see how we got the final piece in place!